On This Page
Make a One Time Payment After Migrating
After migrating from legacy Recurring Billing to the new Recurring Billing,
one-time payments are initiated differently.
To make a one-time on demand payment,
submit a Make Payment request in the Token Management module of the
Cybersource
Business Center
.Perform this task only after the
payment synchronization period
is complete. See Payment Synchronization Period.- To request a one-time payment when you use the new Recurring Billing system:
- Log in to yourCybersourceaccount at theBusiness Center.
- On the left navigation panel, clickToken ManagementandCustomers. The Token Management Customer screen appears.
- Enter your search criteria in Search Results pane and clickSearch. The Search Results pane lists all customer tokens that match your search criteria.
- Click the Token ID link for the customer token for which you want to view details. The Customer Details screen appears and shows more information about the selected customer token.
- In the Payment Methods pane, click the linked Token ID. The Customer Details screen refreshes and shows additional information in the Billing Information, Payment Information, and Payment History panes.
- ClickMake payment. A pop up box titled Make a Payment for this Token appears.
ADDITIONAL INFORMATION
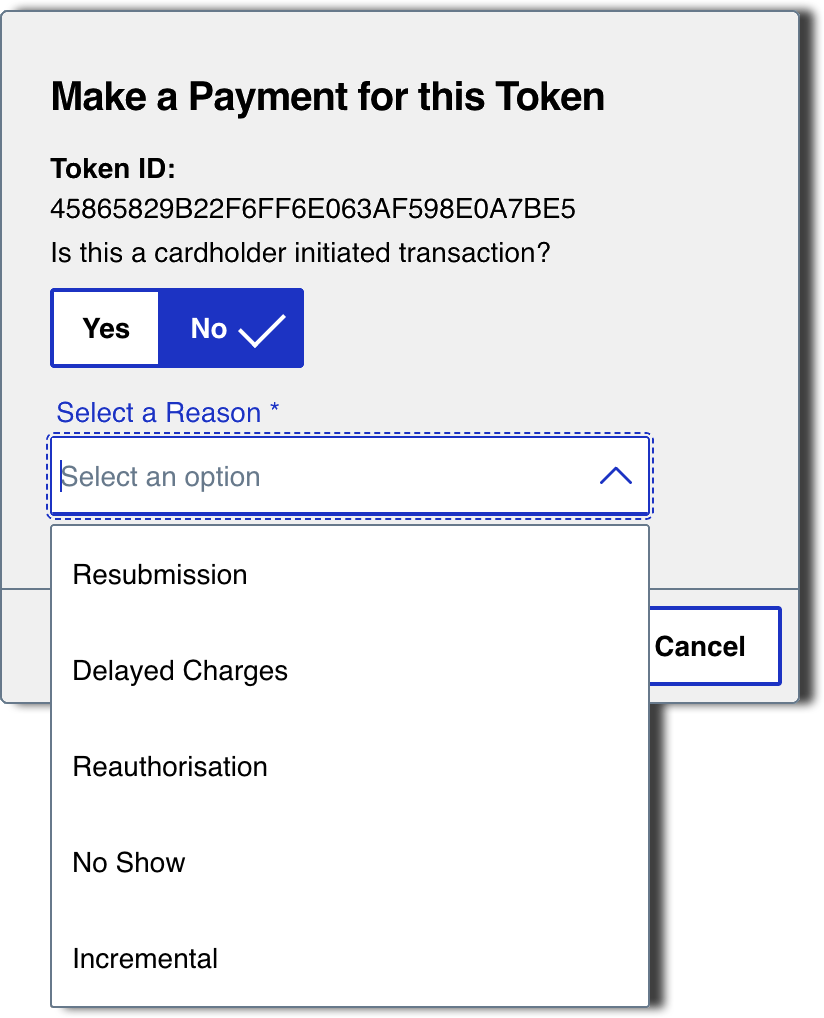
- SelectYesorNoto indicate whether or not the card holder initiated the transaction.
- In the drop-down list, select the reason for the payment.
- ClickProceed. The pop up box closes and the Virtual Terminal screen appears. If you selected Yes to indicate that this is a card holder-iniitiated transaction, the screen includes a Customer Presence pane of read-only information.
- In the Order Details pane, use the Amount and Currency fields to specify the payment amount and then clickNext. The Virtual Terminal screen refreshes to show the Billing Information pane.
- Enter the customer information and clickNext. The Virtual Terminal screen refreshes to show the Order Details, Customer Information, and Payment Information panes.
- Enter the payment card details in the Payment Information pane and clickSubmit. The Order Confirmation pop-up box appears and prompts you to continue with the payment or cancel the payment.
- To continue with the payment request, clickSubmit. The Virtual Terminal Transaction Summary page appears and shows information summarizing the one-time payment.